
AI chatbot overview:
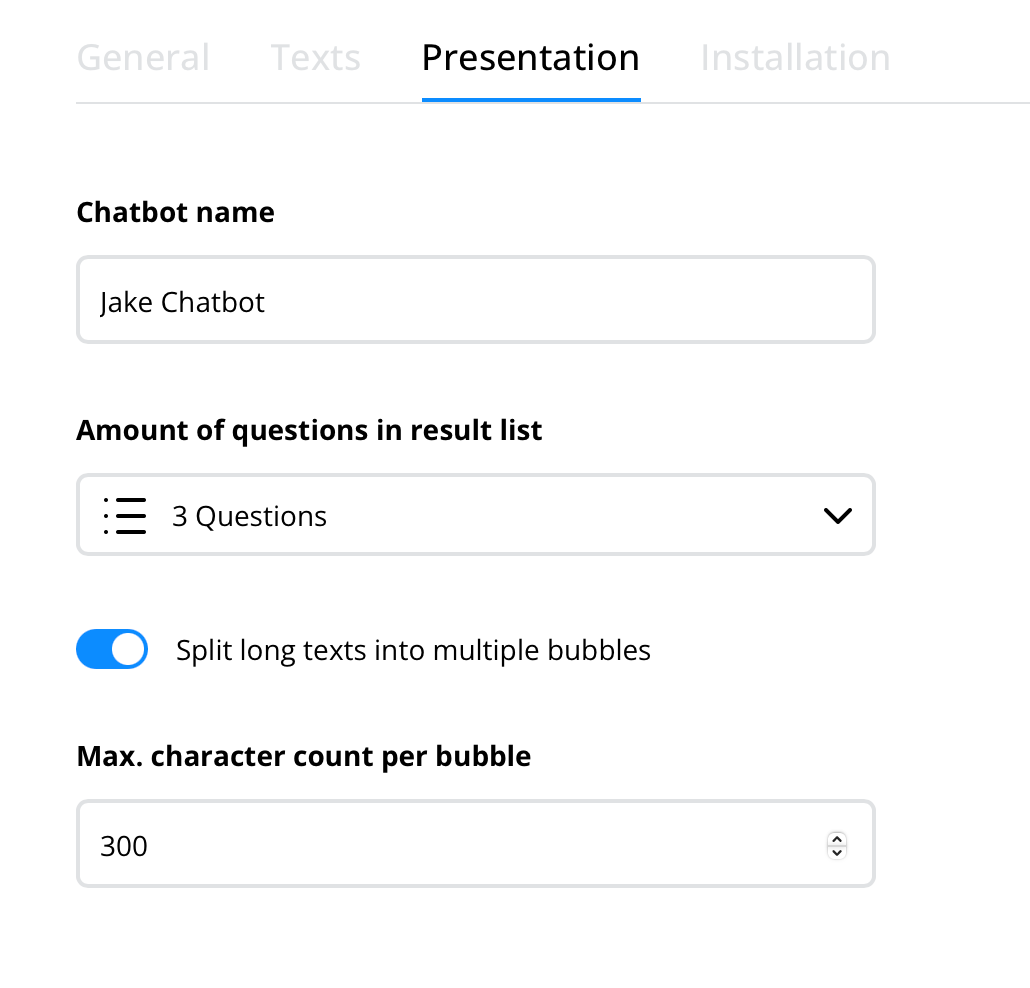
Once you create a new chatbot (via the "+" icon) this screen will appear: Via the General tab, you can define certain information such as the chatbot name, displayed language and provided categories. You will also see an API key that you can reset via the arrow circle. Please do not change this key manually.The tab Texts gives you an overview of automated texts your chatbot uses e.g. closing statements, answer to thanking message when there are no additional questions, text for transferring to an agent etc. All texts can be edited individually.In the Presentation tab you'll see the chatbot name and the amount of questions in the result list. This refers to how many question options will be displayed to your contact. You can also decide to split long texts into multiple bubbles to break up the answer and make it more visually appealing to your contact.

The Installation tab shows a button with the Userlike logo. When you click this button, you'll receive a pop-up explaining further installation instructions. In this pop-up window you will also find the webhook URL, which you need to add to the chatbot operator profile in the dashboard.
How can I activate the AI Chatbot?
In the Dashboard, go to " Team" > "Chatbots" to create a bot operator for your AI chatbot.
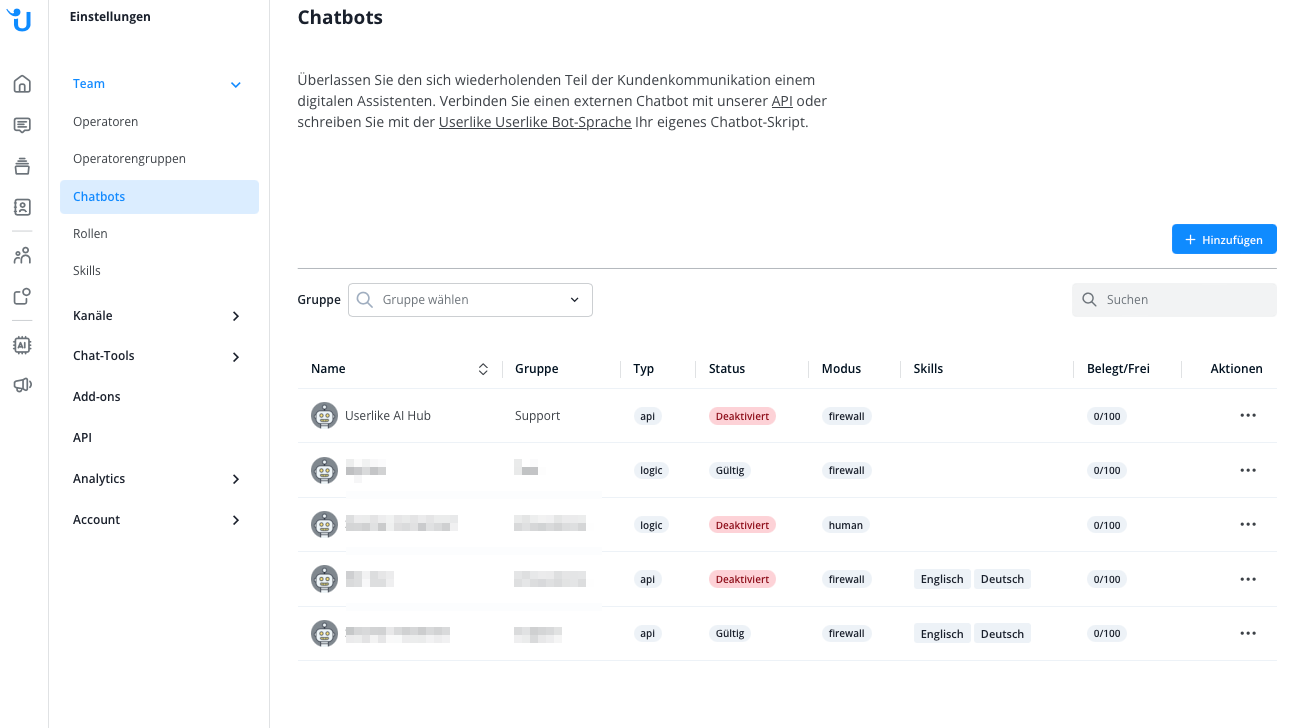
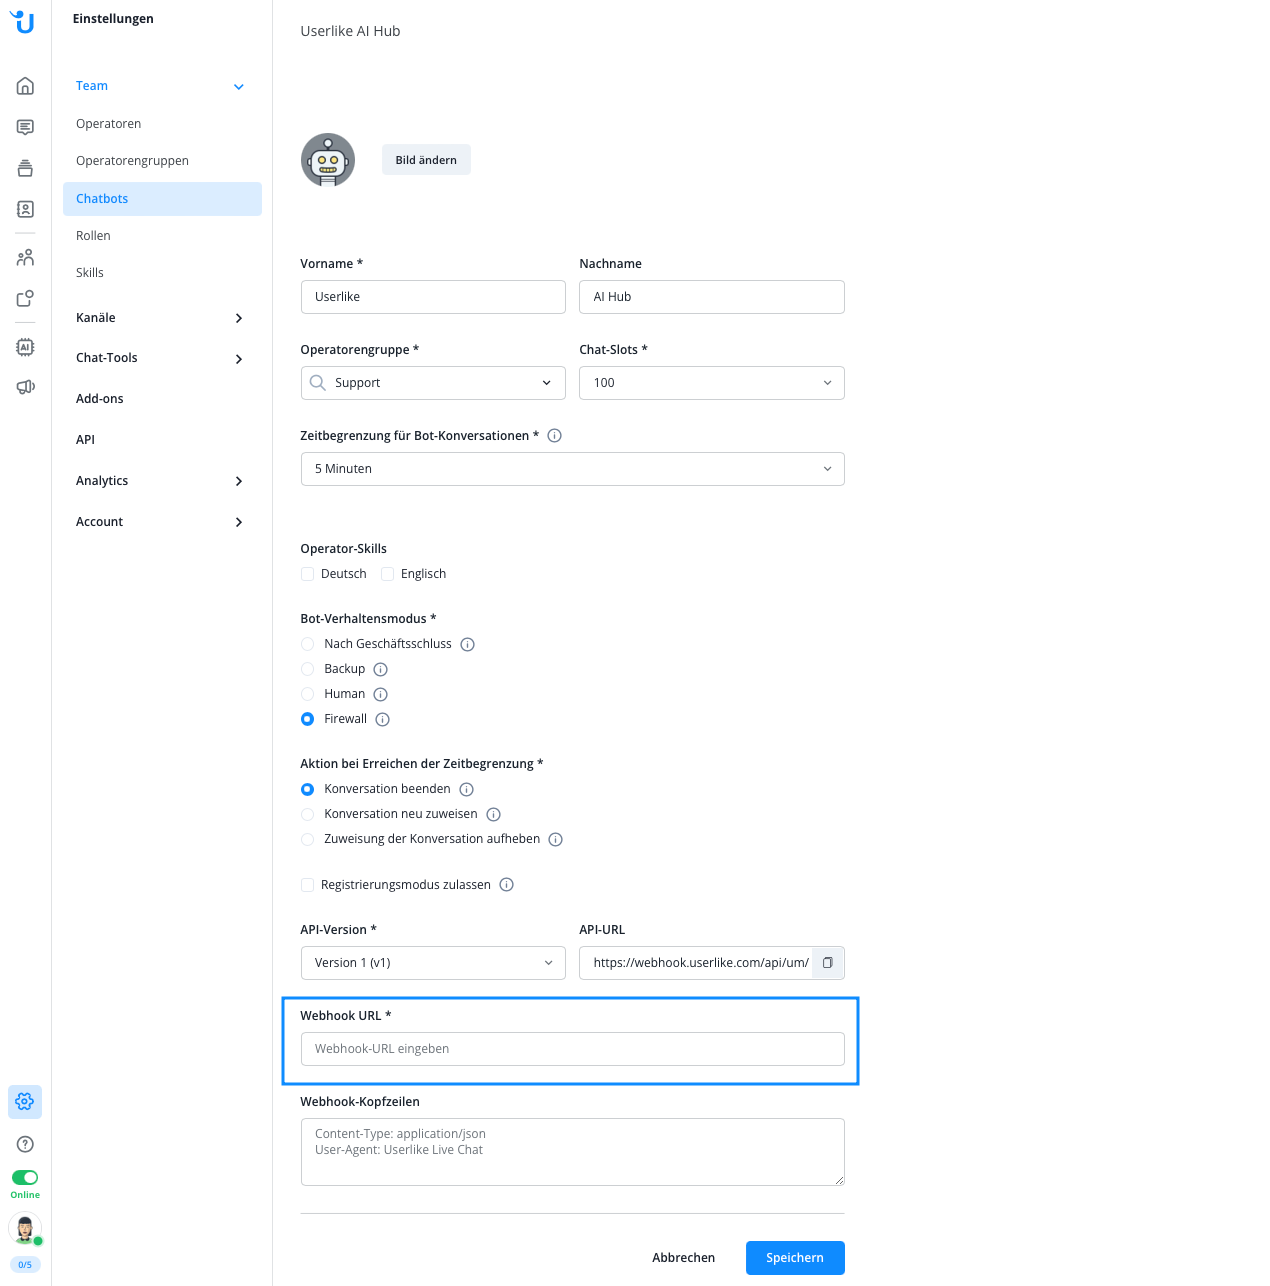
On the right side of the overview, click Add chatbot. Enter a first name (required) and last name (optional). Contacts will see this name during conversations with your bot. You can change your chatbot’s name at any time.
Select Firewall as its behavior mode. This means that the chatbot is always online, receives all incoming conversations and only forwards them to human operators if it can't help.
Then choose an operator group and language for the bot. Each AI chatbot supports only one language. If you receive requests in multiple languages, create a dedicated chatbot for each of them. Click Create chatbot to save the settings.
Because the API endpoint is not configured yet, the chatbot is still labeled as “invalid” in the overview.
To make the bot operational, enter your unique webhook URL, which is displayed in the pop-up window in the automation hub.
Click Update settings to save. The chatbot will now be displayed as “valid” in the overview, which means it’s ready to get to work.
Open your AI chatbot’s profile by clicking its name in the overview. In the Profile tab, you can change the bot’s name and profile picture, both of which are visible to contacts while interacting with it.
Edit the number of chat slots to decide how many contacts the chatbot will assist at the same time. You can also set a bot conversation timeout, which defines after what time a conversation should be considered inactive due to a lack of replies from either side. The action at timeout you set directly below this option triggers after your defined time has elapsed.
How long does it take to train the AI?
Everything is ready for immediate use — no complicated training process necessary. The system is self-learning, which means its intelligence grows over time from conversations and user feedback.
What happens if the chatbot doesn't find a correct answer?
When questions get too complex, the chatbot can seamlessly forward the conversation to an available agent.
Can I see the conversations between my contacts and the chatbot in the Message Center?
You can see the conversation your contacts have with the chatbot once it's set to "ended". The conversation will then appear in the Message Center in the overview under "All conversations". You also see the conversation when it's transferred from the chatbot to a human operator.
Can I adjust how quickly the chatbot replies?
The response delay is calculated automatically to imitate human behavior. This delay depends on the text length of the upcoming text bubble: if the next bubble has a lot of text, the delay is slower, if the bubble has only a small amount of text, the speed increases. This delay is automatic and cannot be changed manually.
Can I use the registration mode before the chatbot conversation begins or can the chatbot also ask the user for their contact details?
Yes, this is possible. Set the login mode in the Userlike Widget Editor and additionally activate it in the settings of the Chatbot Operator.
However, you can also specify that the chatbot asks for your contact information at the beginning of the chat or during the conversation. This can be set in the Automation Hub backend. Please contact your direct contact person at Userlike or our support chat on our website.
General note: